Step-by-Step Guide to Creating Shortened Links
Created on 28 November, 2024 • 📖 Guide • 7 minutes read
Follow this step-by-step guide to create professional, customized short links. Discover how to personalize your URLs, track performance, and boost your online presence with powerful link management features. Perfect for beginners and experts alike!
How to Create and Customize Your Shortened Link? 🤔
Our platform is designed to make creating and managing custom short links as simple and effective as possible. Whether you're a beginner or an experienced user, we’ve got you covered with a step-by-step guide that explains everything you need to know to get started.
What You’ll Learn in This Guide? 👩🏻💻

- How to Create a Shortened Link: A clear walkthrough of creating short URLs that are professional and memorable.
- How to Customize Your Links: Learn to personalize your short URLs with custom text, branding, and domains to make them stand out.
- How to Use Advanced Features: Unlock the power of tracking analytics, UTM parameters, app linking, targeting, and more to enhance your marketing strategies.
Why Follow This Guide? ❓
We know that figuring out new tools can sometimes be overwhelming. That’s why this guide focuses on making the process:
- Easy to Understand: We break down every step with detailed explanations and examples.
- Quick to Implement: Get started with minimal effort, even if you’re a complete beginner.
- SEO-Optimized: Learn how to use features like UTM parameters and branded links to boost your online visibility and drive more traffic to your content.
Key Benefits You’ll Gain: 🔑
- Improve your link click-through rates with professional-looking URLs.
- Build trust and recognition with custom branded links.
- Get actionable insights from link analytics to refine your campaigns.
- Simplify sharing across platforms while making your links mobile-friendly.
Whether you’re sharing content, promoting campaigns, or tracking your audience, this guide will show you how to maximize your results with minimal effort.
Let’s begin! 🚀
Step 1: Sign Up or Log In 🔐
To start, visit the platform and either sign up or log in to your account:
- New user? Click "Sign Up" to create your account in just a few seconds.
- Returning user? Enter your credentials and ”log in”
After logging in, you’ll be redirected to the Dashboard.
- Didn’t get redirected? No worries! You can access the dashboard manually by navigating to this link: Dashboard
Step 2: Access the Shortened Links Section ☰
On the left-hand menu, you’ll see a section called "Shortened Links".
- Click on Shortened Links to open the link management section.
- At the top-right corner, you’ll notice the button "Shortened URL." Click it to start creating your custom link.

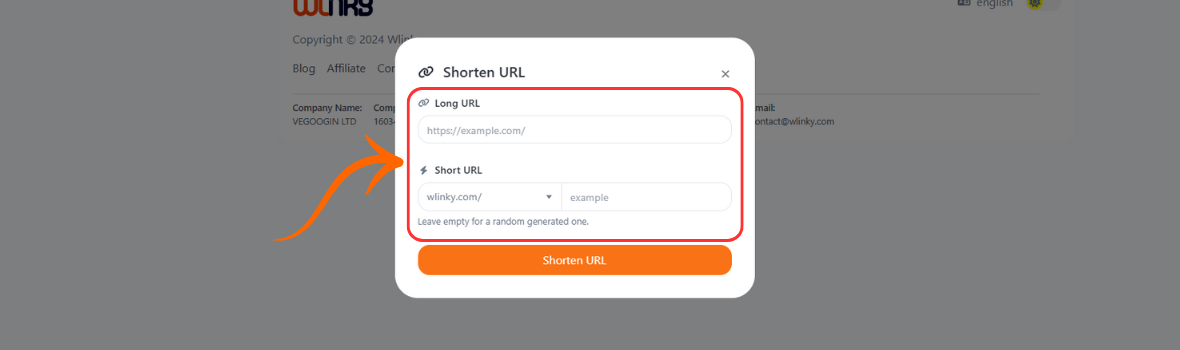
Step 3: Input Your URL 🔗
Now you’ll see two key fields for setting up your link:
- Long URL: This is your original URL that you want to shorten. Simply paste it into this field.
- Short URL: This is the custom short link that users will see. You can either leave it blank to generate a random short link or customize it to make it unique and memorable.
Step 4: Select Your Domain 🌐
By default, your shortened link will use the main domain (e.g., wlink.com).
- Want to use another domain? Just click on the current domain name (e.g., wlink.com) to view all domains available under your plan.
- Exciting News! Even free users can access the premium short domain wly.li, giving your links a sleek and professional look.

Step 5: Customize Your Link with Advanced Features ✏️
After creating your link, you’ll see an extended menu filled with advanced customization options to tailor your link to your needs. These features include tracking pixels, temporary links, UTM parameters, and more.
Below, I’ll provide a detailed explanation of each feature to ensure you can take full advantage of these powerful tools.
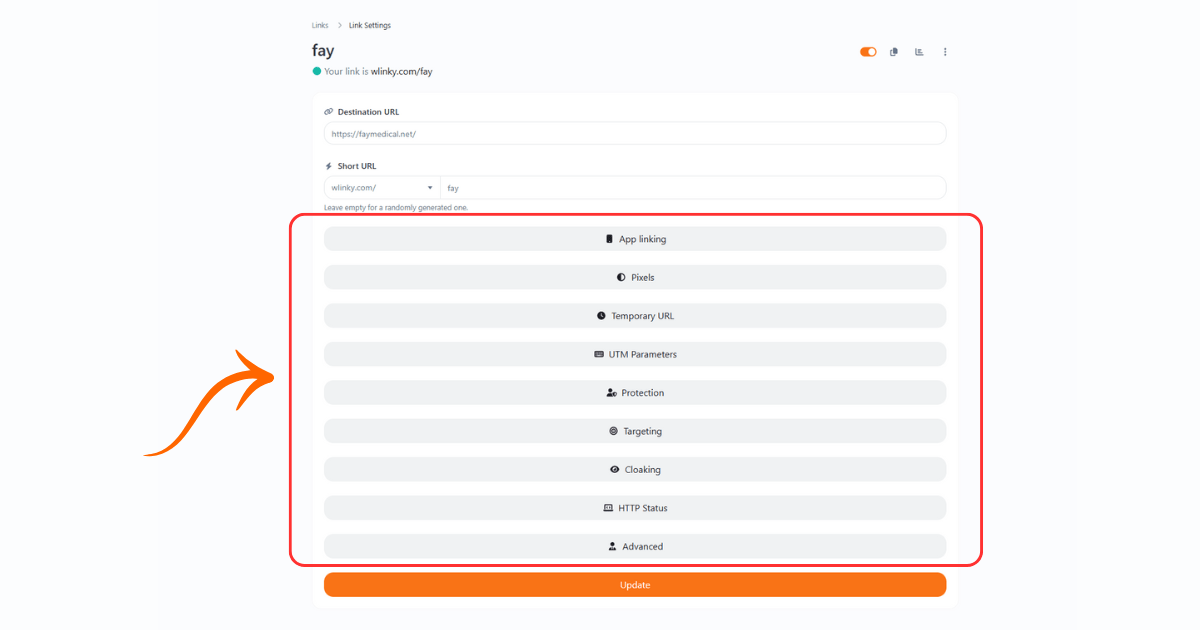
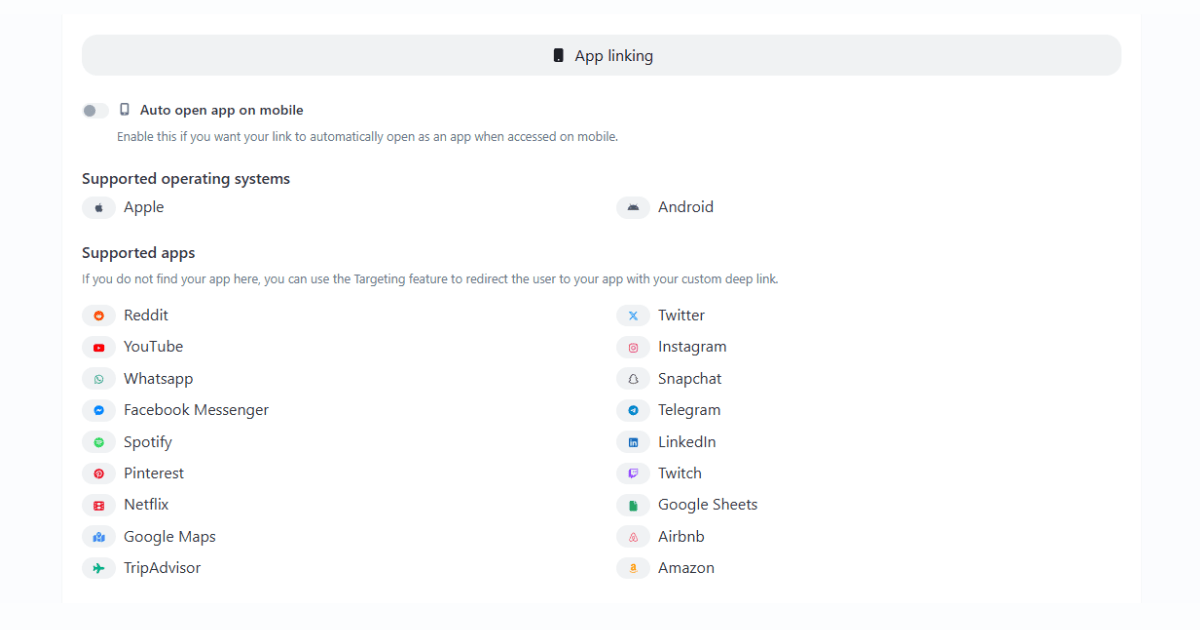
1. App Linking: 📱
What is it?
App Linking enables your link to automatically open the associated app on a mobile device. For example, if you set up a link for Instagram, users who click it on their smartphones will be redirected straight to the Instagram app (if installed).
Why is this awesome?
- Faster User Experience: No need for users to navigate manually. They’re taken directly to the app they need.
- Boosts Engagement: Perfect for driving traffic to your social media or e-commerce apps.
- Simplifies Actions: Removes unnecessary steps for users, making every interaction smooth and seamless.
How to use it:
- Toggle on the “Auto open app on mobile” option.
- Select the operating system: Apple or Android.
- Choose the app from the list (e.g., Twitter, Instagram, YouTube).
2. Pixels: 🟠
What is it?
Pixels allow you to track and analyze user behavior through powerful marketing tools like Facebook Pixel. It gives you insights into who’s clicking your links and what actions they take next.
Why is this a game-changer?
- Optimize Ads: Target your audience with pinpoint accuracy.
- Track Campaign Success: Understand which links drive the most engagement.
- Save Costs: Run highly efficient marketing campaigns by focusing on what works.
How to use it:
- Click on “Create Pixel.”
- Enter the Pixel ID (e.g., your Facebook Pixel ID).
- Activate it to start gathering valuable data.
3. Temporary URL: 🕓
What is it?
This feature allows you to make your links available only for a limited time or after a set number of clicks. Once the limit is reached, the link becomes inactive or redirects users elsewhere.
Why is this essential?
- Perfect for Promotions: Run limited-time offers or exclusive deals.
- Control Access: Restrict access to exclusive content or resources.
- Create Urgency: Encourage faster user actions with time-bound links.
How to use it:
- Set a schedule for when the link will work (start and end dates).
- Define a click limit (e.g., the link stops working after 50 clicks).
- Add an expiration URL to redirect users once the limit is reached.

4. UTM Parameters: ⌨️
What is it?
UTM parameters are small tags you add to your link to track its performance in analytics platforms like Google Analytics. These tags let you see where your traffic is coming from (e.g., email, social media, paid ads).
Why is this incredible?
- Track Traffic Sources: Know exactly where your visitors are coming from.
- Improve Campaigns: Learn which marketing strategies perform best.
- Data-Driven Decisions: Optimize your campaigns based on real results.
How to use it:
- Enter the Source (e.g., Google, newsletter).
- Add the Medium (e.g., email, banner, social).
- Name your campaign (e.g., Black Friday Sale).

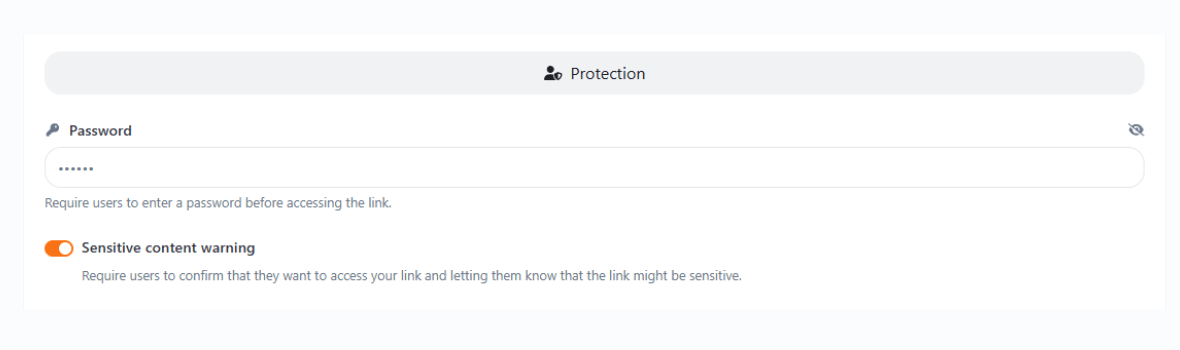
5. Protection: 🔐
What is it?
Add an extra layer of protection to your links with these options:
- Password Protection: Users need to enter a password to access the link.
- Sensitive Content Warning: Warn users before they proceed to potentially sensitive content.
Why is this handy?
- Keep it Private: Share links only with the intended audience.
- Build Trust: Warn users when accessing content that might be sensitive.
- Secure Sharing: Perfect for confidential information or exclusive deals.
How to use it:
- Enable password protection and set a password.
- Turn on the content warning feature if needed.
6. Targeting: 🎯
What is it?
Targeting allows you to send users to different destinations based on their country, language, or device.
Why is this powerful?
- Localized Content: Redirect users to pages tailored for their region.
- Device-Specific Pages: Show mobile users mobile-optimized content.
- Boost Engagement: Serve the right content to the right audience.
How to use it:
- Choose a targeting type (country, language, or device).
- Set up specific URLs for each audience segment.

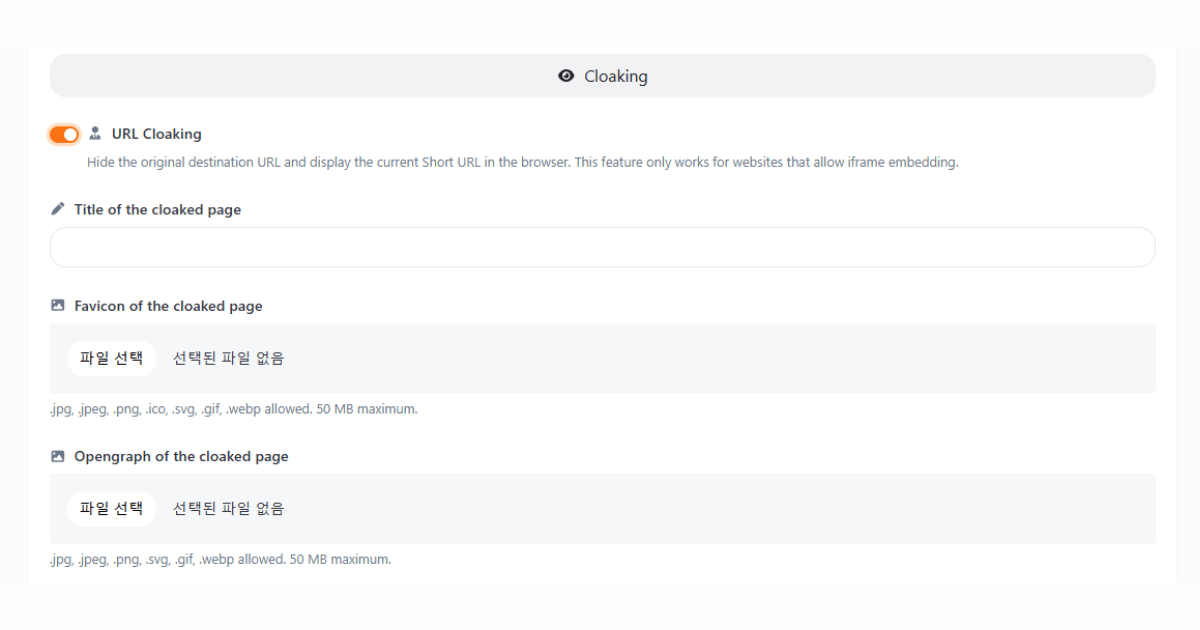
7. URL Cloaking: 👁️
What is it?
URL Cloaking hides the destination URL and displays the short link instead. You can customize how the page appears, including its title and favicon.
Why is this brilliant?
- Enhances Branding: Show your short link instead of a long, messy URL.
- Improves Trust: Users are more likely to click clean and branded links.
- Protects Links: Keep the original URL hidden from competitors or bots.
How to use it:
- Enable the “Cloaking” option.
- Add a title for the cloaked page (this appears in the browser tab).
- Upload a favicon for added customization.
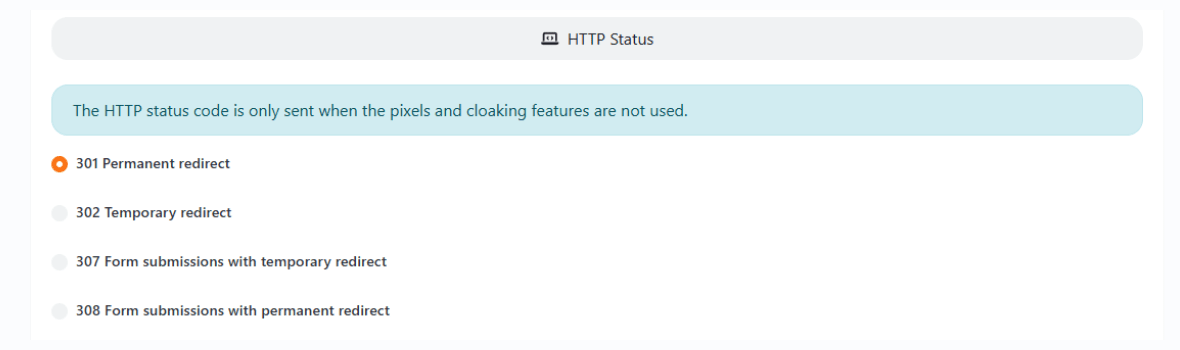
8. HTTP Status: 💻
What is it?
Set the type of redirect for your link. You can choose between:
- 301 Permanent Redirect: For long-term redirects (great for SEO).
- 302 Temporary Redirect: For short-term campaigns or testing.
- 307/308 Redirects: Specialized redirects for form submissions.
Why is this a must-have?
- SEO Benefits: Use 301 redirects to pass SEO value to the destination URL.
- Flexibility: Manage both permanent and temporary campaigns with ease.
- User-Friendly: Keep your audience engaged by ensuring smooth redirections.
How to use it:
- Select the desired redirect type (301 or 302 for most cases).
- Save the changes.
9. Advanced Settings: 👨💻
What is it?
This section lets you organize your links by project, add splash pages, and manage advanced settings for query parameters.
Why is this useful?
- Stay Organized: Group links by project for easier management.
- Add Splash Pages: Display custom messages before redirecting users.
- Fine-Tune Settings: Control advanced behaviors, like query parameter forwarding.
How to use it:
- Assign the link to a project.
- Choose or create a splash page to show before redirection.
- Enable query parameter forwarding if needed.

Why This Platform is Amazing 🤩
This tool is more than just a link shortener—it's your partner in creating smarter, more effective online connections. Whether you're streamlining marketing campaigns, protecting sensitive information, or creating engaging user experiences, every feature is designed to empower you.
Get ready to transform the way you work with links and discover endless possibilities!
Your Wlinky ❤️